ابحث في النصوص البرمجية عن "Buy sell"

ZenTrend Follower Signals (Backtest)Buy/Sell Entry signals based on the ZenTrend Follower indicator.
Entries are taken from the setup and trend breakout level, exits from the trailing stop loss.
Overextension and trend re-entry signals are ignored.
The indicator is linked below
If you enjoy these posts please like and subscribe so more people can join you :)
If you want to tryout the indicator and strategy, follow me and drop a comment or pm and I’ll get you set up.
Stay calm, and happy trading!
More information on the indicator can be found below:

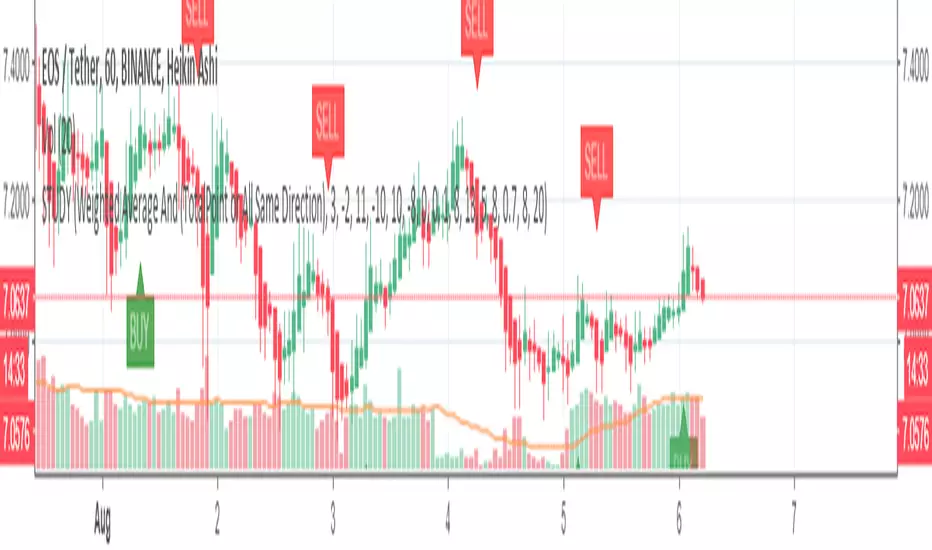
Altcoins StrategyBuy/Sell Altcoins strategy. Based on moving averages, divergences, price and volume

Buy SellKıvanc hocanın yazdığı 2 stop loss indikatörünün birleşmesi sonucu bulundu. Çalışma mantığını kullandıkça anlayacaksınızıdır.


Buy Sell signal by Spicytrader
Get on board before going to the moon !
Spicytrader instantly identifies when a potential pump or dump is beginning.
Compatible with Autoview bot
GET ACCESS : spicytrader.com


Buy/Sell Using MACD and ReversalsUsing the crossover of Signal Line and MACD line predict the reversals of trends in the chart.


Buy/Sell Ahmed Rashiedtrade with confidence good for both intra day and long term took me 2 yrs to finish it

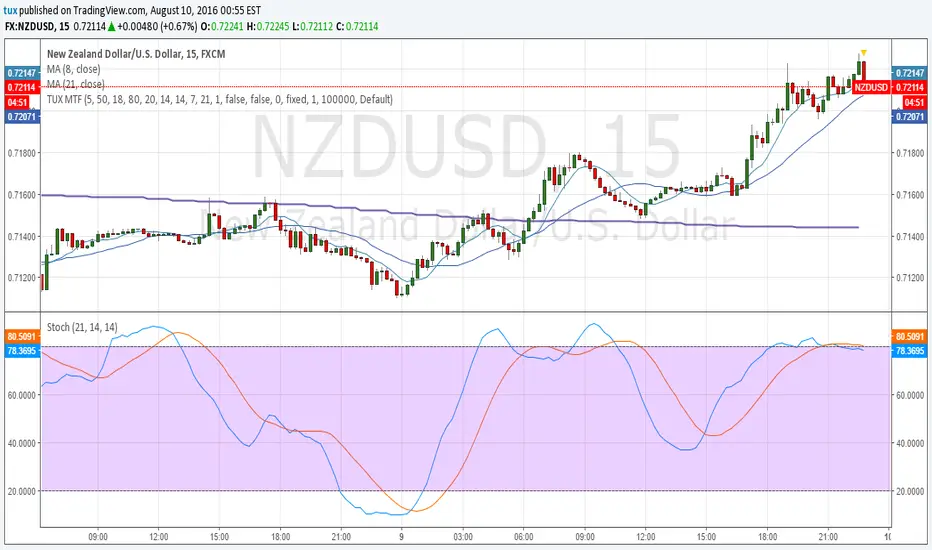
MULTIPLE TIME-FRAME STRATEGY(TREND, MOMENTUM, ENTRY) Hey everyone, this is one strategy that I have found profitable over time. It is a multiple time frame strategy that utilizes 3 time-frames. Highest time-frame is the trend, medium time-frame is the momentum and short time-frame is the entry point.
Long Term:
- If closed candle is above entry then we are looking for longs, otherwise we are looking for shorts
Medium Term:
- If Stoch SmoothK is above or below SmoothK and the momentum matches long term trend then we look for entries.
Short Term:
- If a moving average crossover(long)/crossunder(short) occurs then place a trade in the direction of the trend.
Close Trade:
- Trade is closed when the Medium term SmoothK Crosses under/above SmoothD.
You can mess with the settings to get the best Profit Factor / Percent Profit that matches your plan.
Best of luck!
[STRATEGY][RS]MicuRobert EMA cross V2Great thanks Ricardo , watch this man . Start at 2014 December with 1000 euro.


Integrated Institutional with Signals📘 Integrated Institutional with Signals
🔹 Overview
This indicator is designed as an institutional-grade decision engine, combining MACD, ADX, and RSI into a weighted scoring system to generate high-confidence trading signals.
It not only shows BUY/SELL arrows and labels on the chart but also provides a professional-grade analysis table with confidence levels, regime detection, risk grading, and divergence detection.
The script is suitable for swing traders, positional traders, and intraday traders who need structured, reliable, and multi-factor confirmation before executing trades.
🔹 Key Features
✅ Multi-factor Scoring Engine – MACD, ADX, and RSI combined dynamically
✅ Market Regime Detection – TRENDING vs RANGING + Volatility state
✅ Institutional Confidence Scoring (0–100 scale, with letter grades A+ to D)
✅ Dynamic Indicator Weighting depending on regime and volatility
✅ Signal Filtering – Bullish only, Bearish only, or High Confidence only
✅ Trade Labels & Arrows with grades and entry prices
✅ Bias Background – subtle green/red highlighting of bullish/bearish bias
✅ Professional Tables:
RSI Divergence Table (Bullish/Bearish/Neutral)
Full Institutional Analysis Table with MACD, ADX, RSI, Risk, Regime, and Confidence breakdown
✅ Professional Alerts with ticker, price, ADX strength, divergence info
🔹 How to Use
Add the indicator to your chart.
Open the settings panel and configure:
Signal Confidence Threshold (default 65%)
ADX & MACD parameters
Dynamic Weighting for MACD, ADX, RSI
Signal Filter → All / Bullish only / Bearish only / High Confidence only
Display Options → Tables, Arrows, Labels, Background Bias
Watch for:
BUY/SELL labels on candles with grade + price + confidence
Arrows for quick visualization
Analysis Table for detailed institutional-style breakdown
Alerts for automated notifications
🔹 Table Layout Explanation
📊 RSI Divergence Table
Column Meaning
RSI Indicator being analyzed
STATUS Bullish Divergence / Bearish Divergence / No Divergence
SIGNAL Suggested Action (Buy/Sell/Neutral)
📊 Institutional Analysis Table
Section Details
SIGNAL Final institutional decision (Bullish/Bearish + Grade)
CONF% Risk-adjusted confidence level
POSITION SIZE Suggested sizing (NONE / ¼ / HALF / FULL)
REGIME Market state (TRENDING / RANGING)
VOLATILITY HIGH_VOL / LOW_VOL
MACD / ADX / RSI Direction, confidence % and dynamic weight
RISK Low/Medium/High + Risk Grade (A+ to D)
FOOTER Timestamp + Script version
🔹 Signal Grades
A+ / A → High conviction signals, suitable for larger positions
B+ / B → Medium conviction signals, partial positions suggested
C / D → Weak signals, avoid or use minimal exposure
🔹 Example Use Cases
Filter trades to only take institutional-grade signals.
Confirm signals across multiple indicators before execution.
Use confidence scores and risk grades for position sizing.
Automate alerts for high-conviction Buy/Sell setups.
🔹 Limitations
This indicator does not place trades; it is an analysis tool.
Works best when combined with your own risk management.
Market data depends on TradingView feeds.
🔹 Disclaimer
This script is provided for educational and informational purposes only.
It is not financial advice. Always do your own research and use proper risk management before trading.

Smart Trading DashboardStudy Material for Smart Trading Dashboard (Educational Use)
________________________________________
1. Introduction
The Smart Trading Dashboard is a multi-parameter technical analysis tool built in TradingView.
It combines several important market factors—trend, volume, momentum, open interest (OI), risk/reward, and option ratios—into a single visual dashboard table.
⚠️ This script is not a buy/sell machine. It is for learning market observation and developing discipline in technical analysis.
________________________________________
2. Main Components & Logic
🔹 Supertrend (Trend + Signals)
• Uses ATR (Average True Range) and a multiplier to plot dynamic support/resistance lines.
• Buy signal: Price crosses above supertrend.
• Sell signal: Price crosses below supertrend.
• Dashboard shows "LONG", "SHORT", or "WAIT".
👉 Learning: Students can observe how supertrend filters trends and compare it with sideways markets.
________________________________________
🔹 Entry, Stop Loss & Targets
• Once a signal appears, the script marks levels automatically:
o Entry: Closing price when signal generated.
o Stoploss (SL): % below (for long) or above (for short).
o Targets: 3 stepwise profit levels (10%, 20%, 30% by default).
• Also calculates Risk-Reward Ratio (RR).
👉 Learning: Students practice comparing SL vs. TP. A high RR (≥2) is safer than low RR.
________________________________________
🔹 Volume Analysis
• Uses 20-bar moving average to compare current volume.
• Shows Volume Ratio (Current ÷ Average).
o 1.5 = High volume.
o Around 1 = Normal.
o <1 = Weak.
• Volume Progress % compares today’s traded volume vs. past average.
👉 Learning: Helps understand how strong or weak a move is.
E.g., Price breakout + High Volume Ratio → Valid.
Breakout + Low Volume → Risky.
________________________________________
🔹 PCR (Put-Call Ratio)
• Simulated from 60-minute put/call volumes.
• PCR > 1.2 = Bearish bias (puts dominant).
• PCR < 0.8 = Bullish bias (calls dominant).
• Between 0.8 – 1.2 = Neutral.
👉 Learning: Students see how option traders’ positioning affects market sentiment.
________________________________________
🔹 OI Trend (Open Interest)
• Compares current hour vs. previous hour OI and price.
• Interprets into market behavior:
o Long Buildup → OI ↑ + Price ↑
o Short Buildup → OI ↑ + Price ↓
o Long Unwinding → OI ↓ + Price ↓
o Short Covering → OI ↓ + Price ↑
• Extra cases: Long Accumulation, Bearish Weakness.
👉 Learning: Beginners can observe if positions are being added or exited.
________________________________________
🔹 RSI Momentum
• RSI < 30 → Market oversold (Bullish momentum).
• RSI > 70 → Market overbought (Bearish momentum).
• Else → Neutral.
👉 Learning: Track momentum alignment with signals.
________________________________________
🔹 PDC (Previous Day Close levels)
• If price > yesterday’s high → Bullish.
• If price < yesterday’s low → Bearish.
• Else Neutral.
👉 Learning: Simple method to check if the market is breaking out of yesterday’s range.
________________________________________
🔹 Dashboard Table (Dark Theme)
The script creates a professional black-themed dashboard on the chart with:
1. Signal & Momentum → LONG/SHORT/WAIT + RSI condition.
2. Trend → Bullish/Bearish/Neutral.
3. Volume % & Buy/Sell Bias.
4. Price, Entry, SL, Targets, RR.
5. Performance metrics: Profit %, OI status, Day Range, etc.
6. Volume details: Today’s Volume, Avg Volume, Put/Call Vol, PCR, ATM Strike.
👉 Learning: Students can read multiple factors in one glance instead of switching indicators.
________________________________________
🔹 Alerts
The script can trigger alerts for:
• Buy/Sell signals.
• High volume spikes.
• Profit target achievements (5%, 10%).
👉 Learning: Students practice monitoring without staring at charts all the time.
________________________________________
3. How Students Should Use It
1. Observation First, No Trading:
Track how signals behave across trends, ranges, and news events.
2. Journal Keeping:
Note signal type, SL, RR, volume strength, and actual market result.
3. Focus on Risk/Reward:
Avoid setups where RR < 1.
4. Combine With Candlestick Study:
Look for patterns (Doji, Engulfing) near signal levels.
5. Timeframe Adaptation:
Short timeframes = noisy signals. Higher = more reliable.
________________________________________
4. Common Beginner Mistakes
• Blindly following "LONG" or "SHORT" without checking volume & OI confirmation.
• Ignoring Stop Loss (most critical).
• Trading every signal (overtrading).
• Assuming 100% accuracy.
• Not adjusting parameters (ATR, RR) for different assets.
________________________________________
5. Educational Value
By practicing with this dashboard, a student learns:
• How trend, volume, OI, momentum interact.
• Why confirmation from multiple indicators is stronger than one.
• How to think in probabilities, not certainties.
________________________________________
6. Disclaimer
This script is developed for educational purposes only under TradingView study guidelines.
• It is not financial advice.
• Past performance ≠ future results.
• Misuse for blind speculation can lead to financial loss.
• Always apply risk management and consult a certified advisor for actual trading.
________________________________________
✅ With this dashboard, students can train their market eye:
• See when signals succeed/fail.
• Understand market psychology behind OI & PCR.
• Build patience and discipline instead of chasing trades.
Disclaimer from aiTrendview
This script and its trading signals are provided for training and educational purposes only. They do not constitute financial advice or a guaranteed trading system. Trading involves substantial risk, and there is the potential to lose all invested capital. Users should perform their own analysis and consult with qualified financial professionals before making any trading decisions. aiTrendview disclaims any liability for losses incurred from using this code or trading based on its signals. Use this tool responsibly, and trade only with risk capital.

Game Theory Trading StrategyGame Theory Trading Strategy: Explanation and Working Logic
This Pine Script (version 5) code implements a trading strategy named "Game Theory Trading Strategy" in TradingView. Unlike the previous indicator, this is a full-fledged strategy with automated entry/exit rules, risk management, and backtesting capabilities. It uses Game Theory principles to analyze market behavior, focusing on herd behavior, institutional flows, liquidity traps, and Nash equilibrium to generate buy (long) and sell (short) signals. Below, I'll explain the strategy's purpose, working logic, key components, and usage tips in detail.
1. General Description
Purpose: The strategy identifies high-probability trading opportunities by combining Game Theory concepts (herd behavior, contrarian signals, Nash equilibrium) with technical analysis (RSI, volume, momentum). It aims to exploit market inefficiencies caused by retail herd behavior, institutional flows, and liquidity traps. The strategy is designed for automated trading with defined risk management (stop-loss/take-profit) and position sizing based on market conditions.
Key Features:
Herd Behavior Detection: Identifies retail panic buying/selling using RSI and volume spikes.
Liquidity Traps: Detects stop-loss hunting zones where price breaks recent highs/lows but reverses.
Institutional Flow Analysis: Tracks high-volume institutional activity via Accumulation/Distribution and volume spikes.
Nash Equilibrium: Uses statistical price bands to assess whether the market is in equilibrium or deviated (overbought/oversold).
Risk Management: Configurable stop-loss (SL) and take-profit (TP) percentages, dynamic position sizing based on Game Theory (minimax principle).
Visualization: Displays Nash bands, signals, background colors, and two tables (Game Theory status and backtest results).
Backtesting: Tracks performance metrics like win rate, profit factor, max drawdown, and Sharpe ratio.
Strategy Settings:
Initial capital: $10,000.
Pyramiding: Up to 3 positions.
Position size: 10% of equity (default_qty_value=10).
Configurable inputs for RSI, volume, liquidity, institutional flow, Nash equilibrium, and risk management.
Warning: This is a strategy, not just an indicator. It executes trades automatically in TradingView's Strategy Tester. Always backtest thoroughly and use proper risk management before live trading.
2. Working Logic (Step by Step)
The strategy processes each bar (candle) to generate signals, manage positions, and update performance metrics. Here's how it works:
a. Input Parameters
The inputs are grouped for clarity:
Herd Behavior (🐑):
RSI Period (14): For overbought/oversold detection.
Volume MA Period (20): To calculate average volume for spike detection.
Herd Threshold (2.0): Volume multiplier for detecting herd activity.
Liquidity Analysis (💧):
Liquidity Lookback (50): Bars to check for recent highs/lows.
Liquidity Sensitivity (1.5): Volume multiplier for trap detection.
Institutional Flow (🏦):
Institutional Volume Multiplier (2.5): For detecting large volume spikes.
Institutional MA Period (21): For Accumulation/Distribution smoothing.
Nash Equilibrium (⚖️):
Nash Period (100): For calculating price mean and standard deviation.
Nash Deviation (0.02): Multiplier for equilibrium bands.
Risk Management (🛡️):
Use Stop-Loss (true): Enables SL at 2% below/above entry price.
Use Take-Profit (true): Enables TP at 5% above/below entry price.
b. Herd Behavior Detection
RSI (14): Checks for extreme conditions:
Overbought: RSI > 70 (potential herd buying).
Oversold: RSI < 30 (potential herd selling).
Volume Spike: Volume > SMA(20) x 2.0 (herd_threshold).
Momentum: Price change over 10 bars (close - close ) compared to its SMA(20).
Herd Signals:
Herd Buying: RSI > 70 + volume spike + positive momentum = Retail buying frenzy (red background).
Herd Selling: RSI < 30 + volume spike + negative momentum = Retail selling panic (green background).
c. Liquidity Trap Detection
Recent Highs/Lows: Calculated over 50 bars (liquidity_lookback).
Psychological Levels: Nearest round numbers (e.g., $100, $110) as potential stop-loss zones.
Trap Conditions:
Up Trap: Price breaks recent high, closes below it, with a volume spike (volume > SMA x 1.5).
Down Trap: Price breaks recent low, closes above it, with a volume spike.
Visualization: Traps are marked with small red/green crosses above/below bars.
d. Institutional Flow Analysis
Volume Check: Volume > SMA(20) x 2.5 (inst_volume_mult) = Institutional activity.
Accumulation/Distribution (AD):
Formula: ((close - low) - (high - close)) / (high - low) * volume, cumulated over time.
Smoothed with SMA(21) (inst_ma_length).
Accumulation: AD > MA + high volume = Institutions buying.
Distribution: AD < MA + high volume = Institutions selling.
Smart Money Index: (close - open) / (high - low) * volume, smoothed with SMA(20). Positive = Smart money buying.
e. Nash Equilibrium
Calculation:
Price mean: SMA(100) (nash_period).
Standard deviation: stdev(100).
Upper Nash: Mean + StdDev x 0.02 (nash_deviation).
Lower Nash: Mean - StdDev x 0.02.
Conditions:
Near Equilibrium: Price between upper and lower Nash bands (stable market).
Above Nash: Price > upper band (overbought, sell potential).
Below Nash: Price < lower band (oversold, buy potential).
Visualization: Orange line (mean), red/green lines (upper/lower bands).
f. Game Theory Signals
The strategy generates three types of signals, combined into long/short triggers:
Contrarian Signals:
Buy: Herd selling + (accumulation or down trap) = Go against retail panic.
Sell: Herd buying + (distribution or up trap).
Momentum Signals:
Buy: Below Nash + positive smart money + no herd buying.
Sell: Above Nash + negative smart money + no herd selling.
Nash Reversion Signals:
Buy: Below Nash + rising close (close > close ) + volume > MA.
Sell: Above Nash + falling close + volume > MA.
Final Signals:
Long Signal: Contrarian buy OR momentum buy OR Nash reversion buy.
Short Signal: Contrarian sell OR momentum sell OR Nash reversion sell.
g. Position Management
Position Sizing (Minimax Principle):
Default: 1.0 (10% of equity).
In Nash equilibrium: Reduced to 0.5 (conservative).
During institutional volume: Increased to 1.5 (aggressive).
Entries:
Long: If long_signal is true and no existing long position (strategy.position_size <= 0).
Short: If short_signal is true and no existing short position (strategy.position_size >= 0).
Exits:
Stop-Loss: If use_sl=true, set at 2% below/above entry price.
Take-Profit: If use_tp=true, set at 5% above/below entry price.
Pyramiding: Up to 3 concurrent positions allowed.
h. Visualization
Nash Bands: Orange (mean), red (upper), green (lower).
Background Colors:
Herd buying: Red (90% transparency).
Herd selling: Green.
Institutional volume: Blue.
Signals:
Contrarian buy/sell: Green/red triangles below/above bars.
Liquidity traps: Red/green crosses above/below bars.
Tables:
Game Theory Table (Top-Right):
Herd Behavior: Buying frenzy, selling panic, or normal.
Institutional Flow: Accumulation, distribution, or neutral.
Nash Equilibrium: In equilibrium, above, or below.
Liquidity Status: Trap detected or safe.
Position Suggestion: Long (green), Short (red), or Wait (gray).
Backtest Table (Bottom-Right):
Total Trades: Number of closed trades.
Win Rate: Percentage of winning trades.
Net Profit/Loss: In USD, colored green/red.
Profit Factor: Gross profit / gross loss.
Max Drawdown: Peak-to-trough equity drop (%).
Win/Loss Trades: Number of winning/losing trades.
Risk/Reward Ratio: Simplified Sharpe ratio (returns / drawdown).
Avg Win/Loss Ratio: Average win per trade / average loss per trade.
Last Update: Current time.
i. Backtesting Metrics
Tracks:
Total trades, winning/losing trades.
Win rate (%).
Net profit ($).
Profit factor (gross profit / gross loss).
Max drawdown (%).
Simplified Sharpe ratio (returns / drawdown).
Average win/loss ratio.
Updates metrics on each closed trade.
Displays a label on the last bar with backtest period, total trades, win rate, and net profit.
j. Alerts
No explicit alertconditions defined, but you can add them for long_signal and short_signal (e.g., alertcondition(long_signal, "GT Long Entry", "Long Signal Detected!")).
Use TradingView's alert system with Strategy Tester outputs.
3. Usage Tips
Timeframe: Best for H1-D1 timeframes. Shorter frames (M1-M15) may produce noisy signals.
Settings:
Risk Management: Adjust sl_percent (e.g., 1% for volatile markets) and tp_percent (e.g., 3% for scalping).
Herd Threshold: Increase to 2.5 for stricter herd detection in choppy markets.
Liquidity Lookback: Reduce to 20 for faster markets (e.g., crypto).
Nash Period: Increase to 200 for longer-term analysis.
Backtesting:
Use TradingView's Strategy Tester to evaluate performance.
Check win rate (>50%), profit factor (>1.5), and max drawdown (<20%) for viability.
Test on different assets/timeframes to ensure robustness.
Live Trading:
Start with a demo account.
Combine with other indicators (e.g., EMAs, support/resistance) for confirmation.
Monitor liquidity traps and institutional flow for context.
Risk Management:
Always use SL/TP to limit losses.
Adjust position_size for risk tolerance (e.g., 5% of equity for conservative trading).
Avoid over-leveraging (pyramiding=3 can amplify risk).
Troubleshooting:
If no trades are executed, check signal conditions (e.g., lower herd_threshold or liquidity_sensitivity).
Ensure sufficient historical data for Nash and liquidity calculations.
If tables overlap, adjust position.top_right/bottom_right coordinates.
4. Key Differences from the Previous Indicator
Indicator vs. Strategy: The previous code was an indicator (VP + Game Theory Integrated Strategy) focused on visualization and alerts. This is a strategy with automated entries/exits and backtesting.
Volume Profile: Absent in this strategy, making it lighter but less focused on high-volume zones.
Wick Analysis: Not included here, unlike the previous indicator's heavy reliance on wick patterns.
Backtesting: This strategy includes detailed performance metrics and a backtest table, absent in the indicator.
Simpler Signals: Focuses on Game Theory signals (contrarian, momentum, Nash reversion) without the "Power/Ultra Power" hierarchy.
Risk Management: Explicit SL/TP and dynamic position sizing, not present in the indicator.
5. Conclusion
The "Game Theory Trading Strategy" is a sophisticated system leveraging herd behavior, institutional flows, liquidity traps, and Nash equilibrium to trade market inefficiencies. It’s designed for traders who understand Game Theory principles and want automated execution with robust risk management. However, it requires thorough backtesting and parameter optimization for specific markets (e.g., forex, crypto, stocks). The backtest table and visual aids make it easy to monitor performance, but always combine with other analysis tools and proper capital management.
If you need help with backtesting, adding alerts, or optimizing parameters, let me know!
